Description:
Uploaded on Wednesday, January 25, 2023
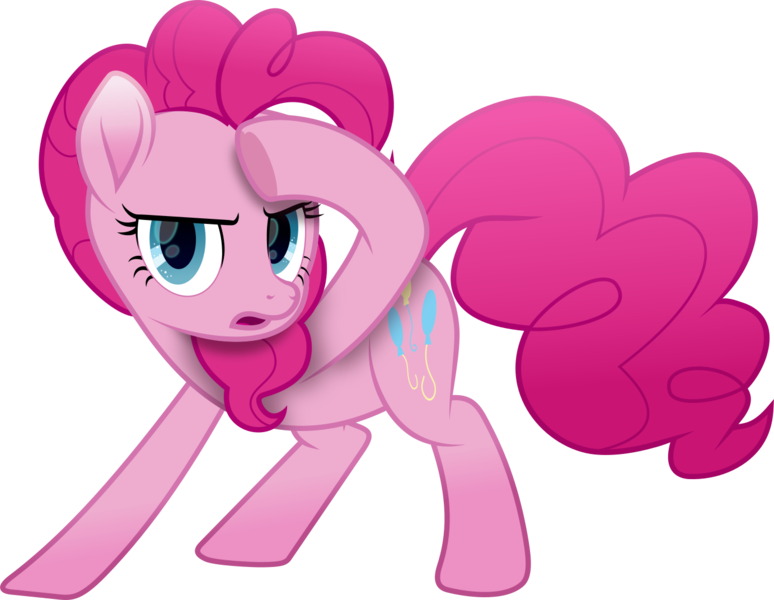
Did this Pinkie vector in celebration of finally learning how to use a Ponyscape original feature, Fill Between Many! Makes updating fills a lot easier for vectoring 😁😇
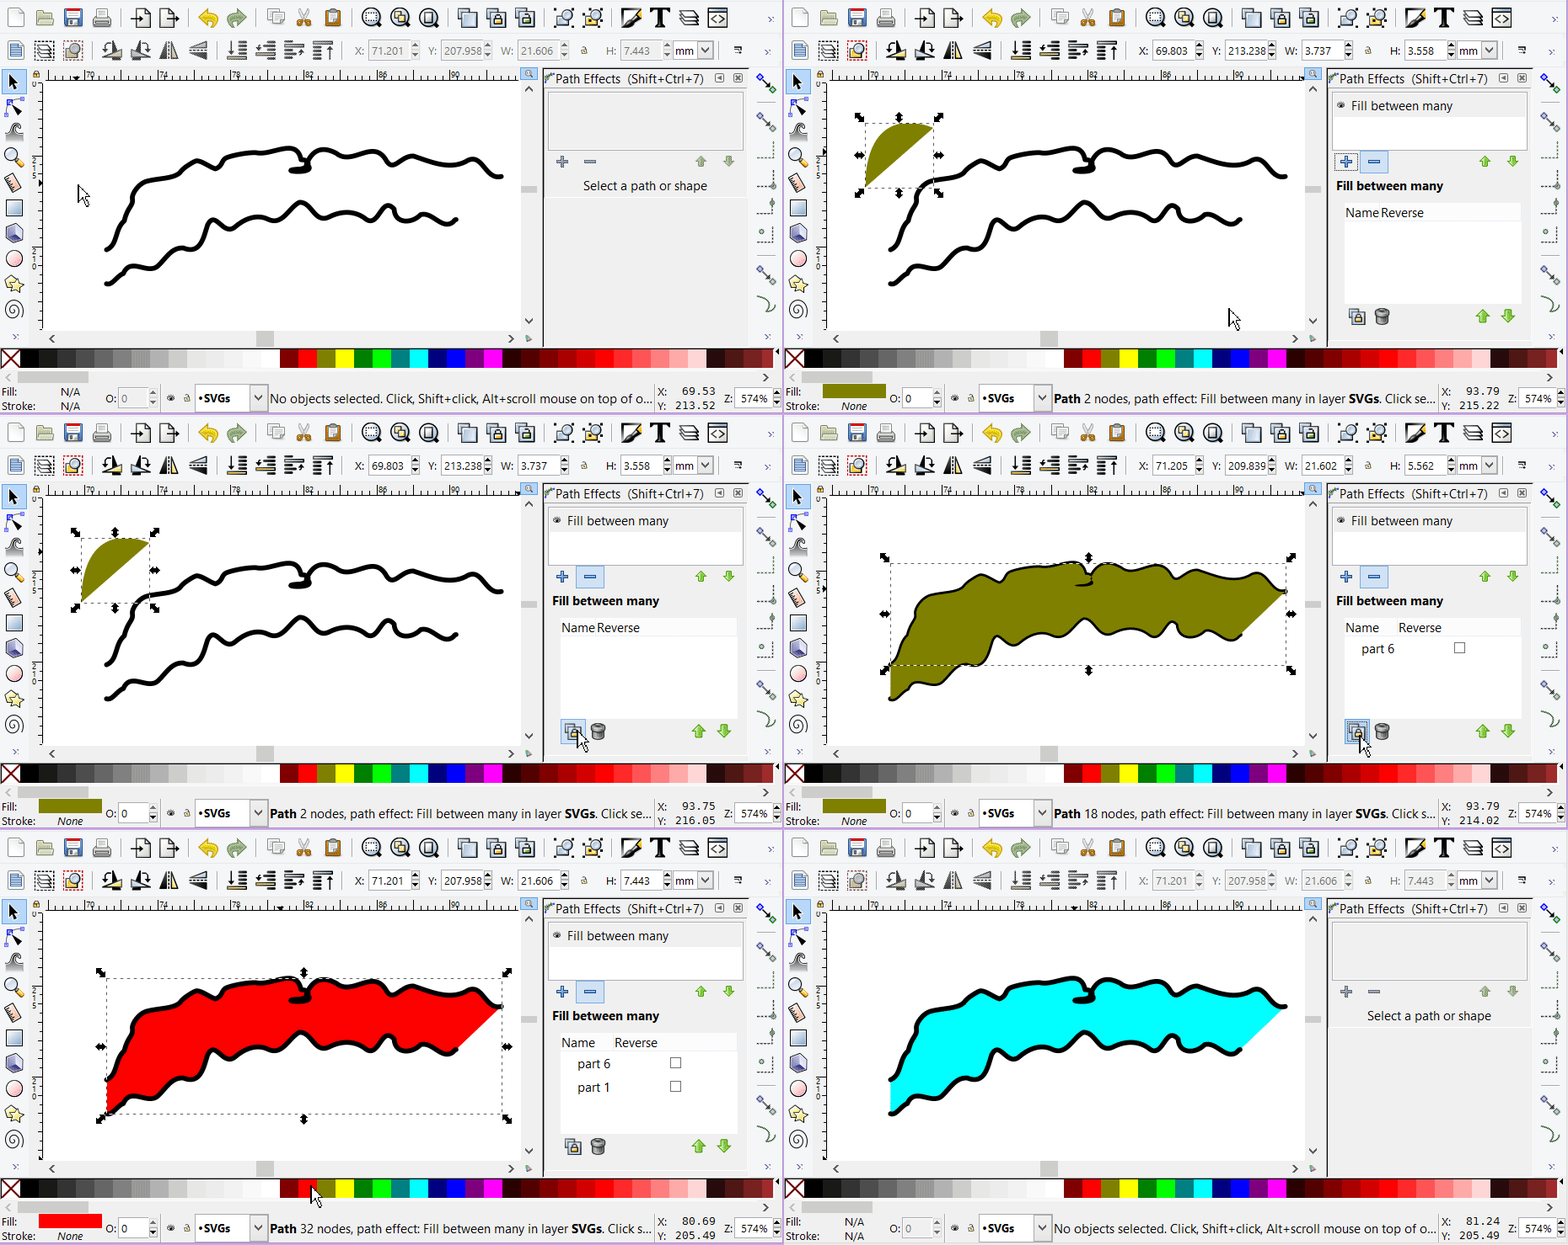
First learned about that function thanks to DA past MLP vector artist R4inbowR4ge, on his Powerstrokes tutorial; as he used Fill Between Strokes there in a similar way. I figured out how to apply it to my Taper Stroke method thanks to this Inkscape forum post question, further in which there was a helpful GIF explaining everything posted by Tyler Durden here:
As per Marco's description, seems to work. It requires a path object to provide the fill data, while the existing paths define the boundary data.
When the mouse moves up the the commands-bar, I'm clicking COPY.
This GIF was super helpful to me - and, if you peek inside the SVG, you will see Fill Between Many has been made use of a lot in this vector. 😁
In simplification of the GIF, I'll summarize here:
To use Fill Between Many, choose the area of your pony you would like to apply the fill to (i.e. in this vector, Pinkie's rear front leg). Draw a separate object in a space not occupied by your vector, and set a normal fill to it (can be either a solid flat color or a gradient). With that color set, head to the menu, go to Path Effects (Ctrl+Shift+7), and type in "fill" or scroll down until you see the Fill Between Many (not Fill Between Strokes, as it will work the same but only between strokes and not other path effects like Taper Strokes or Powerstrokes) path effect. Your separate fill will look the same, but there will be a dialogue box on the side that will allow you to apply it to your outlines and place a fill between all of them. Next, copy the first stroke (or Taper or Powerstroke) you would wish to have a linked fill between, and copy it to your clipboard (Ctrl+C). Select the independent object will Fill Between Many applied, and press the dialogue box button that says "Link to Path." The fill will now transfer to your outline area, and if you edit the outline for any reason, the fill will follow it since it is linked. Select any additional outlines in the same way you want linked to the fill (I would only suggest a few, since having multiple fills linked can still cause deleted fill between issues). If you run into a problem where two or more linked fills appear to not fill the outline area correctly, play around with the Reverse checkbox in the dialogue for each path (by either checking it or unchecking it) and it should solve your problem and produce a neat, clean fill. If it does not, you will have to delete the fill between on whichever path(s) may be causing the issue and apply Fill Between Many to their outlines separately. If you see my vector file, you will notice how certain folks are checked and unchecked in various groups (Ctrl+G) to accommodate for this problem.
You might be wondering,"How can you do shading if the fill between isn't a defined outline (as for example, the leg outline)?" Just duplicate the object with the path effect applied, use the conversion Path to Object (Ctrl+Shift+C) on the object with the Fill Between Many applied to turn it into an object, and unite it with a duplicate of your outline (converted by Path to Object if it's a Taper Stroke or Powerstroke, and Stroke to Path [Ctrl+Alt+C] if it's a normal stroke) by using Path Union (Ctrl++) (bold + indicates the addition, not the plus key). Once your object encompassing the region you want to shade is visible, draw your full object for the shade or highlight, lower it beneath the encompassing fill (or outline, if you turn the fill off to see your shading fill better), select both objects with Click+Shift held down, and head to the menu above or right-click to find the Clip menu and Set Clip as usual. 🙂
Annnnd there's a long tutorial within a vector description! 😆 I really need to make a video for this at some point... 😁
Enjoy the Pinkie vector guys!
One note: this is based on the screencap below, but I can't remember the episode name. 🤔

If anyone could help with that, please tag it in for me or let me know! Thank you! 🤗
Had some movie-style mane, eye and tail help from both Rainbow Roadtrip and previous movie accurate vectors. 😇

